

While Google might be kind enough to tell you the reason for your penalty in an email, unfortunately they're not going to provide you with an extensive report of the causes.
This is where the penalty removal process starts to get technical, any ways that you can scale data gathering and analysis is going to be a huge help here. You can hire a professional to do this for you, but if you're reading this guide I assume you want to know how to do it yourself, or at least be able to make the right decisions when hiring someone else to do it for you.
There are currently four usable sources for link data, and since they all use their own software to crawl the web and index the activity, they will usually each show you slightly different datasets.
Individually they might be incomplete, but add them all together and you're likely to get a pretty accurate picture of your link profile.
Google's own suite of free tools for webmasters can show you a list of domains that are pointing to your site, but won't show you much else.
Step 1: Log in to Webmaster Tools
Search for www.google.com/webmaster/tools, or just search for "webmaster tools" and click on the first result. If you have not yet signed up for webmaster tools, you'll be shown this page.
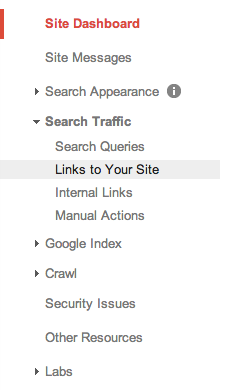
Step 2: Navigate to the Link Report
If your site is not yet linked to Webmaster tools, click on "Add A Site" in the top right hand corner of the panel.

Note: Google have recommended adding both the www. version and the non-www. version of your website to Webmaster Tools, so that no data slips through the cracks.
Once your site is linked and you can see the panel below, click "Search Traffic > Links to Your Site".
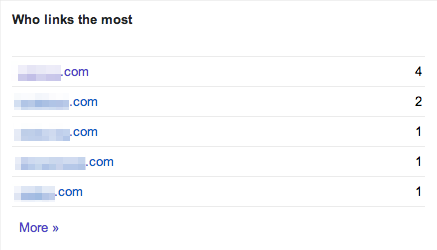
Step 3: Download a Spreadsheet of Your Referring Domains
Then under the section titled "Who links the most", click "More".
You'll be shown a number of linking URLs. To get them all, click "Download more sample links".

You'll be asked whether to download the data in a CSV file or Google Docs format. Go with whichever you're comfortable using.
However, we would recommend collecting and manipulating your data in a Google Docs spreadsheet, as this may make things smoother when sending in the reconsideration request. Data from CSV files can be easily imported to a Google spreadsheet.
One of the best link profile analysis tools available on the web is Majestic SEO, and you'll be able to do everything you need to with a free account.
Navigate to www.majesticseo.com and type your site name into the search bar. Make sure that "Use Fresh Index" is checked underneath.

We'll look at more of the graphs and displays you'll see on the next page in Chapter 4, but for now we'll focus on downloading our data so we have full control.
Click on the "Backlinks" tab, then scroll to the bottom of the page and click "Download Data".
Choose your preferred format, and grab your data!
You may have heard of Moz.com before. They're a big deal in the SEO community, and their suite of analytics tools is difficult to beat, though they come at a price. As a free subscriber, however, you can still access what their database has on your site, and download it.
Navigate to www.opensiteexplorer.com and type your site name into the search bar. Be sure to write it out in full, including the "www." as this can have an effect on the completeness of the data that this particular tool returns to you.

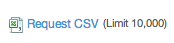
Click on the "Request CSV".
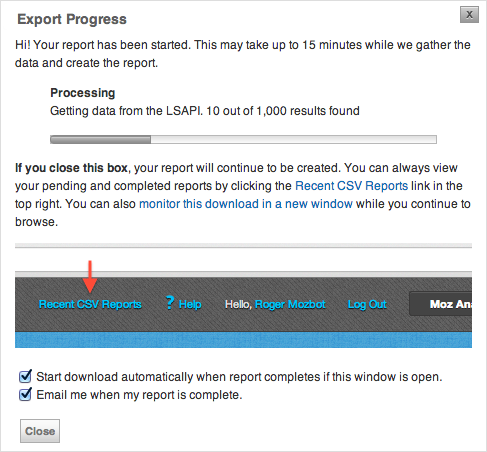
And you should see this popup as your data is exported.
In a similar league to Majestic SEO, Ahrefs is another popular alternative that boasts some unique features, which we'll get into later.
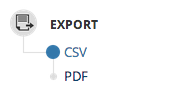
Exporting from their database is dead easyGo to Ahrefs.com and type your full domain into the search bar.

In the bottom left corner of the first page you see after searching for your domain you will see "CSV" and "PDF" under the "Export" subheading. Of course we want CSV, so we can manipulate our data.
If you don't yet have an account with them, you'll be prompted to join before being allowed to download the data.
Note: "Raw Export" as they call it is only available under their paid subscription plan. It might be worth to hopping onto their plan for a month to use all their features while you resolve your penalty. It's up to you.
Now it's time to collate your link profile into a spreadsheet.
As we've said, it's generally advisable to use Google Spreadsheets at this point, although many people may feel more comfortable manipulating the data in Excel and then transferring to Google Spreadsheets once you're done.
You're going to be sending Google your spreadsheet with your reinclusion request, and Google has previously stated that they are wary of any links sent to them that go to sources they don't completely trust.
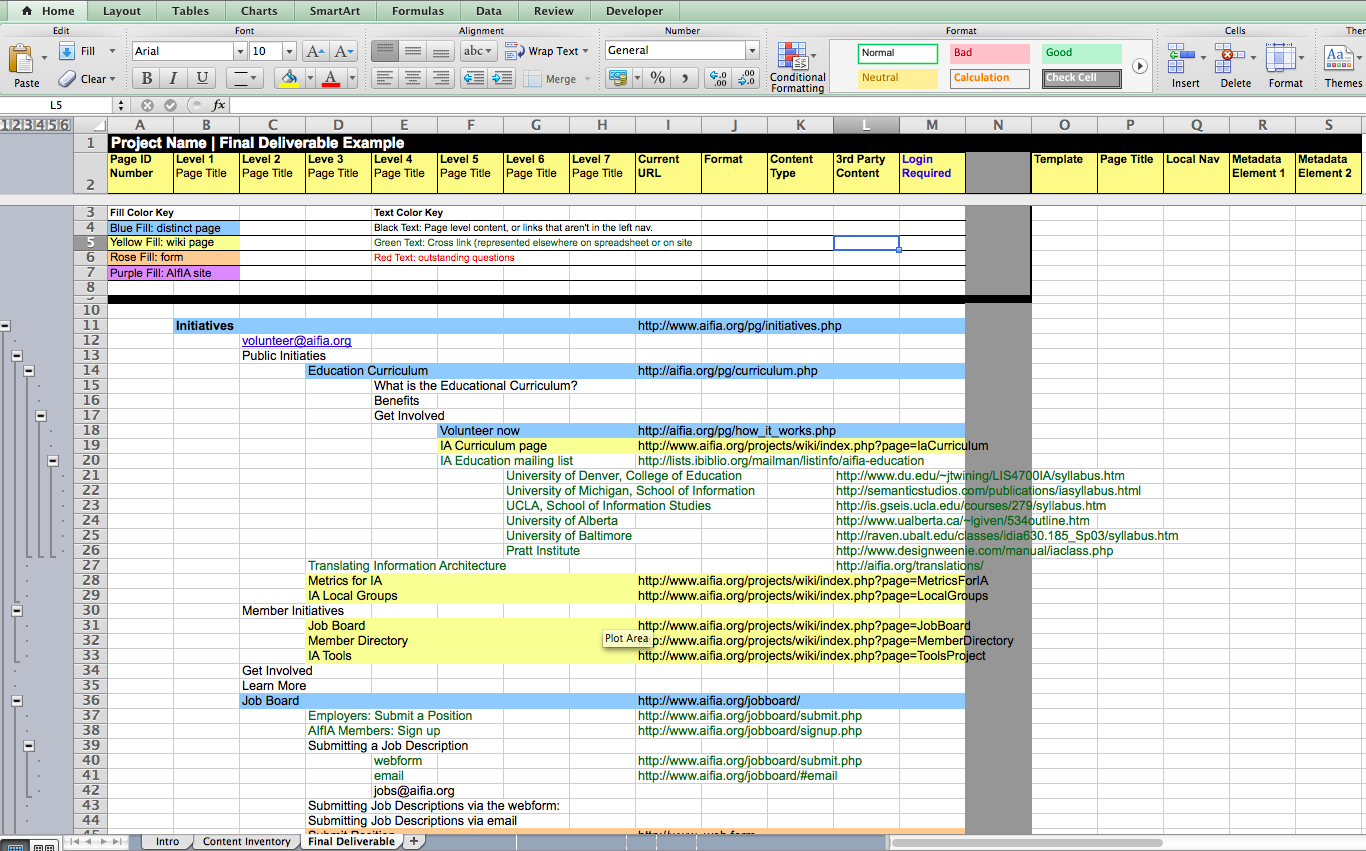
We have created an Excel Template that uses a set of sample data

We have added sample data and formatting to give you an idea of how the data should be formatted, but feel free to add and remove elements as you need them.
The main objective here is that you end up with a file with an extensive (as possible) picture of you link profile along with as much data and insight as you can get for each URL.
Copy-and-paste the data from each link source into the relevant sheets.

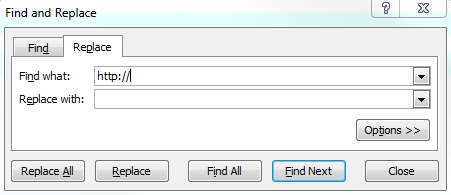
Once you have copied each of the link data sources into Excel then the trick to effectively organising the data is to ensure that you're working with unique records. On each sheet run a 'find and replace' and strip out any instances of the following from each URL,
Then copy and paste the date from the data sources sheets into the Master Data sheet taking care to match the correct data to the correct column.
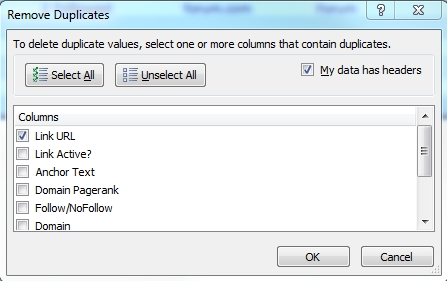
Then de-dupe this data by going to the Data tab and selecting 'Remove Duplicates' ensuring that you only have the Link URL column selected.
This may seem like overkill, but consider following the template, rather than collecting all the data in one source. It will allow the person or people who will review your reinclusion request to see at a glance how much work you have put into the cleaning up of your site.
It helped in school, and it will help again now. In essence: make notes and show all your working. Remember this information will be used in the manual review, so the more detail you can pass the reviewer then the better insight they'll have into your workings. For example you may record things such as,
#webmaster asked for exorbitant amount of money to remove link
#sent email to webmaster@spamdomain.com 18/1/14 & 23/1/14 no reply
This is especially important when you come to clean up your links, because simply deleting rows from the spreadsheet will make it look like they were never there in the first place. It's critical to instead mark a link as deleted at the end of its row. More on this in Chapter 5.
If you're sure that the penalty you've sustained was an algorithmic one, and not a manual action, then of course you don't need to win extra brownie points with anyone. It's still advisable, however, to be as thorough as you can be. If you find it easier, simply consolidate all your link data into one sheet.
You'll find that each source includes different columns, other than the URL and anchor text, that might be useful:
What's most critical, however, is the information you gain about the people you have to contact.
Whether or not you use our spreadsheet, include the following columns in your main spreadsheet:
You won't need to fill each column to the full, at least not with all the different contact details. The benefit of parsing out this information into separate columns, as opposed to keeping all contact details in one column and contact records in another, is that it makes the Google reviewer's lives a lot easier when they look at the records you've kept. We've found the template above to be the best way of documenting data.
We also advise on adding a sheet named "Screenshots" to keep snapshots of example emails that you've sent to webmasters, just so there is no doubt as to exactly how you’ve been tackling this problem.
A content inventory can be endlessly useful. It can help you:
If you're sure that content is not a problem for your site, you might be tempted to skip this step. However, we would advise that whether or not your content is in dire need of change, if you don't have a system in place for keeping track and staying on top of it all, you will find yourself in a chaotic position at some point in the future. One of the biggest 'surprise' expenses of time and money on a website can be the content, especially when you don't know what you already have, and what it's actually there for.
A content inventory is a necessarily human task.
The best that a piece of software can do is search for broken links, typos, and content duplication. That certainly has its uses, but the fact is software cannot look at a piece of content and judge whether or not it's insightful, useful, or entertaining.
Google's algorithm can come closer than any other, but you really need a human to look at content to judge it properly. This is why the manual penalty exists in the first place.
Algorithmic penalties based on content problems certainly do exist. The Panda update helped Google to analyse a site, to find if it's stuffed full of duplicate, spun content, or grammatically awful content. Otherwise, the algorithm can only go by hints that you might not be delivering everything you can to your readers, such as poor relevancy, or frustrated visitors returning quickly to the search results, calling in a manual reviewer to confirm how good your content actually is.
So, for a qualitative review, you need a human mind to take stock of your content, whether it's your own, or one of your employees'. Be advised to have your content inventory carried out by someone who knows your company well and who isn't afraid to ask questions.
It may seem like a pain to have to do an inventory, but having a fresh-faced intern do it will leave you with a less than accurate review, and you'll be handing over the strongest benefit of the content review to the intern. While it may be time consuming, the act of doing a content inventory instills an unparalleled insight into the architecture of your website. It's not a low-level job, and you'd be better off having it carried out by someone in a decision making position, or by someone trained in information architecture, who can be employed as a full time content curator.
While there's a lot to be said about the field of information architecture as it relates to websites, we'll stick to the basic content inventory for now.
Open another Google Docs spreadsheet, and include the following columns:
There are any number of additional heuristics that you may want to consider if you want to dig really deep into the nature of your content. Depending on the nature of your site and one the level of understanding you believe you currently hold over the content, you may wish to include any of the following:
We'll dive into these heuristics and what they mean in Chapter 4. For now, we'll focus on making a record of the content structure of your site on the whole.
There's no getting around it. This is time consuming, but incredibly valuable, not just for the purposes of revoking your penalty, but also for the future of your content strategy.
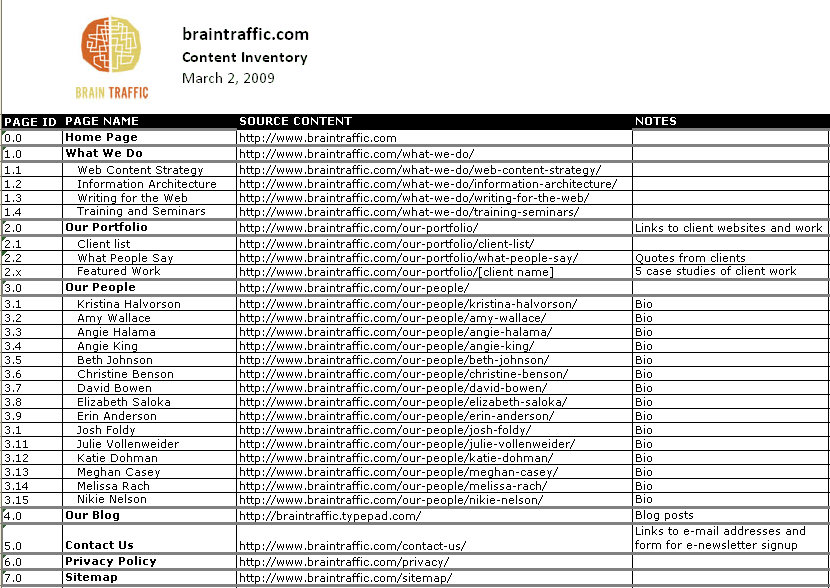
Start at the home page, and fill out the top row, assigning a Page ID of "0.0".
Then, simply start clicking through the entirety of your site. Assign other top-tier pages as "1.0", "2.0" and so on, and any pages nestled under them as "1.1", "1.2", "2.1", and so on, as in this example courtesy of BrainTraffic.com:
We'll dive into the qualitative analysis of your content in the next chapter. For now, collecting your content data means making a note of every page, and displaying it in a way that can be scanned, added to, and eventually populated with as little or as much information as you need.
After implementing the techniques in this chapter you should have a very healthy spreadsheet or two with which to leap into the all important stages of analysing the problem areas of your website.
Perhaps your links are causing you grief, or maybe your content is the traitor. Both require taking an audit of what exists already, so you know exactly what you're starting with.
Keep going to discover how to make sense of it all...
Want do download a PDF version of the guide?